There’s never been a better time to record guitars using DI, or direct input. The method works with bass guitars, electric guitars and even acoustic guitars and other stringed instruments.
Recording DI offers some advantages like being able to reamp the DI track through an amp after recording and being able to use amp sims that open the door to a wide variety of tones and effects right from your computer, not to mention being able to record everything from home and produce full songs yourself.
Amp sims have come a long way in recent years and sound better than ever—some sound as good as the real thing.
Plus you can get a good low-latency audio interface to record guitars direct for as little as $99 these days.
You only need a few things to get started, but it’s easy to get the wrong gear and there are a number of things to know to get the best out of recording DI guitars.
This guide will help you get started down the right path and hopefully avoid some of the pitfalls.
Also, if you’re just getting started recording here’s another article that will help a lot: How to Record and Make Music at Home (For Free, Even).
Audio Interface
Aside from the obvious need of a guitar and a computer, the #1 thing that you are going to need to record DI guitars is an audio interface to plug your guitar into in order to transfer the signal to your computer digitally.
The problem with many of audio interfaces, however, is they have half-assed drivers that induce too much latency or don’t perform well when pushing the CPU hard, as amp sims often do.
For that reason I highly recommend the 2nd gen Focusrite Scarlett interfaces for recording DI guitars. They have the lowest latency in their price range and it’s even lower than more expensive interfaces. I use a Scarlett 2i2 and it works great with the latest driver.
If you’re on a tight budget the Scarlett Solo model can be had for as little as $99, but I prefer the 2i2 with the 1/4-inch balanced outs, combo jacks, and separate volume dial for headphones. All 2nd gen Scarletts have the same low latency and sound quality so it just depends on how many ins and outs and extra features you need.
If you have more money to spend RME interfaces are well known for having the best drivers and low latency, but their least expensive USB interface, the RME Babyface Pro, costs $749 so it’s a big step up in price.
Don’t fall for the zero-latency or direct monitor features that some interfaces advertise because that requires hearing the dry unprocessed guitar signal instead of hearing it through an amp sim. That just defeats the whole purpose.
Any audio interface with a Hi-Z input will work for recording guitars directly, but again a lot of them don’t perform well in the latency department…
Latency
Latency is basically the amount of time it takes the audio signal to travel into your computer and through any software and plugins that you’re using and then out through the speakers.
Low latency is super important when it comes to recording DI guitars because any added delay in the sound makes it hard to play accurately and in time.
Anything under 10ms of overall latency is generally pretty good for most people when it comes to recording guitars.
As a general guideline each millisecond of latency is the equivalent to the delay in sound you hear when standing 1 foot away from a speaker. So running at 10ms of latency is like standing 10 feet away from an amp, which isn’t a problem for most guitarists when tracking.
It depends on a number of factors but the Scarlett interfaces can typically get down to about 5.3ms of overall latency at a 44kHz setting with a 32 sample buffer size, so that’s only like standing 5 feet away from an amp. I generally use the 64 sample setting, which has 7.8ms of latency, because I can’t really tell a difference and I can push the CPU harder at that setting.
The Scarletts can actually go even lower to around 3ms but on my computer that cranks CPU usage through the roof. That’s another problem with some other interfaces is they have a low latency setting but it only works at a high CPU load that it makes it impossible to use with more than a couple plugins.
Latency numbers and buffer size settings go hand in hand. The lower the buffer setting on your interface the lower the latency, but that raises CPU usage. After you’ve recorded all of your guitar parts, you can increase the buffer size to lower CPU usage since low latency only matters while recording.
Another thing that contributes to latency is the plugins that you use. Some plugins add latency and some don’t—it all depends on the plugin so it’s something that you have to keep an eye on. For example, adding an EQ plugin before or after an amp sim can help make it sound a lot better, but some EQs add latency so you have to pay attention to that (DAWs display the latency numbers, or samples, that each plugin adds).
DAW?
A digital audio workstation, or DAW for short, is the software used to record, arrange, and edit music, among other things.
Most amp sims come in plugin format and require a host, a DAW, to run them. But some amp sims, like Amplitube, are available as standalone programs that you can use on your computer without a DAW.
You’re better off using a DAW because then you have more control over everything and you can easily record your guitar along with a metronome and/or drums and start putting a song together.
There are even a number of free DAWs that you can use, and Ableton Live Lite comes with just about every MIDI controller these days. Ableton Live’s session view is a great way to quickly and easily record various guitar riffs without having to stick to a rigid timeline structure. However the lack of audio comping may send you to a different DAW for final drafts.
See this list of DAWs for more information about them. You can get something like Reaper for as little as $60 and it’s as good of any of the expensive options.
Additionally, I highly recommend getting a drum plugin such as EZdrummer. Playing guitar along with drums is much more rewarding than using a metronome only, and they come with pre-arranged beats that you can use and modify with little effort.
Amp Sims
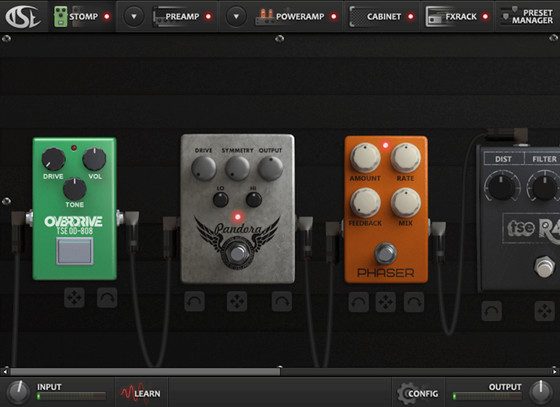
There’s an ever-growing list of amp sims available on the market, modeling just about every amp and pedal you’ve ever heard of. It’s pretty cool to be able to play a variety of expensive amps that you’d never be able to afford normally.
Here’s a list of the best free and paid amp sims. I recommend trying Thermionik and Amplitube 4. S-Gear also gets a lot of praise but I’ve never tried it.
Volume Levels – Avoid Clipping
It’s important to set the gain level on your audio interface to a level that avoids clipping. With digital, the signal doesn’t need to be right on the edge of clipping so make sure to lower the level enough to keep out of the red.
The same goes the plugins that you use: adjust their gain levels to keep volume levels consistent and from clipping the master fader, which causes distortion and sounds bad.
It’s always a good idea to lower the volume of the individual tracks in your DAW by at least a few decibels. It’s also good practice to use a limiter to avoid going over 0dB and damaging your speakers or hearing.
You also don’t want your levels too quite. Even when using the same guitar you may need to adjust the level depending on if you’re playing heavy power chords or soft single note leads.
EQ
Proper use of EQ can greatly improve the sound quality of your recorded guitar tone when using amp sims. Even free amp sims can sound great with the right EQing.
See this earlier article with a couple of videos showing How to EQ Distorted and DI Guitars.
Mixing Guitars – Amp Sims
Here’s another tutorial with Tips for Mixing Guitars When Using Amp Simulators.
It covers things like dual-tracking, using filters, compression, EQ, etc.

