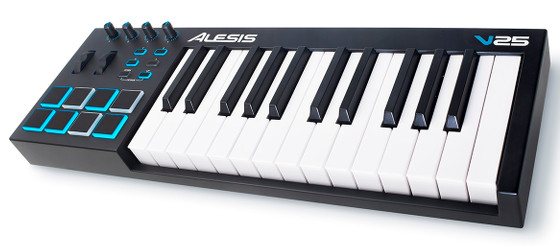
The latest lineup of MIDI keyboard controllers from Alesis, the V Series and VI Series, come with velocity sensitive keys and pads.
The sensitivity and velocity of the drum pads and keyboard keys is fully adjustable using Alesis’s V Editor software.
The software is free to download from the Alesis website under the docs & downloads section for each individual model.
I recently purchased an Alesis V25, so this tutorial is specific to it, but the same process applies to the other models as well, the V49, V61, VI25, VI49, and VI61.
When I first started using the V25 keyboard controller, I found the drum pads required much more pressure than I was expecting to get a full sound. My fingers would’ve been worn down to bloody nubs in no time with the default settings.
I wasn’t really sure what the Alesis V Editor software was for at first since there isn’t much of an explanation anywhere. But the software comes with a user guide that explains how to use the software to fully customize every knob, dial, wheel, pad, and key on the controller.
I suggest reading the user guide first before beginning. It doesn’t appear to be available for download anywhere, but you can access it from the help menu using the V Editor software.
Velocity Curve Settings
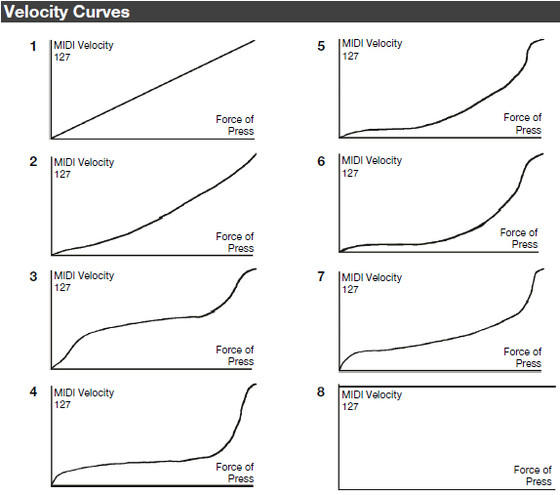
The user manual contains a picture that shows all the different velocity curve settings that you can apply to your Alesis MIDI controller.
The default setting for the pads is curve 1 and the keys curve 4, at least that’s what they were on my V25. Note that curve 8 has no sensitivity, so even a light press of a key registers at full velocity.
To adjust the settings on your Alesis keyboard controller:
- Plug the Alesis keyboard into your computer.
- Launch the V Editor software.
- Select the controller’s input and output from the Device Setup menu in Options (MIDIIN2 and MIDIOUT2).
- At this point it’s a good idea to select to Get Preset from Hardware and save a copy to your computer.
- Choose each tab to enter custom settings into the entry fields (the user guide explains the details for each section).
- To finish, select to Send Preset to Hardware to save the settings to the keyboard (it can only save one preset at a time).
After some experimenting, I’ve been using curve 6 for the pads and the keys. That seems to work pretty well for synths, but with drum software like EZdrummer 2 it still requires too hard of a hit to get a good consistent sound. I’m still trying to come up with better settings for drums. Using full velocity and then changing it via software is probably what I’ll end up doing.
How about you? Which velocity curve do you find works best?


Everytime I select input and output and confirm it, it’ll shut down the editor, it says “Alesis V49 Editor.exe has stopped working” … what should I do?
Oh, I had my DAW on, sorry 🙂
Set the input and output as the midi version in device setup and it will work while using a DAW. Also make sure to update your software if you haven’t already. I updated mine the other day after I noticed there was a new update put out in November and the key sensitivity is better now, but I still get a lot of double hits on the pads.
I’m using the VI49 with Abelton Live and wanting to send MIDI via Live out of the DIN port to a drum machine on one channel, and USB MIDI from the keyboard to Ableton on a different channel. Is it possible? I can’t figure out how to address the DIN in software…
I don’t know. I haven’t tried anything like that yet because I always just use USB to connect everything. I know you can setup the drum pads on a MIDI keyboard to use a different channel than the keys with Live so it might be possible. This might help: Using external hardware with Live.
Curve 3 worked better for me. You are right about the drums pads, they are still to hard. But I am getting used to tap with one finger for ghost notes, two fingers for normal playing, and tree fingers for the loudest hits. Works pretty well and it feels more like a real hand percussion instrument, rather than little buttons to play drums. Thanks, all the best!
Hey, thanks for the info! This really helped.
You’re welcome!
Why in Christ’s name would a company develop all this hardware, and then blow it on making it hard to play? QC anyone?