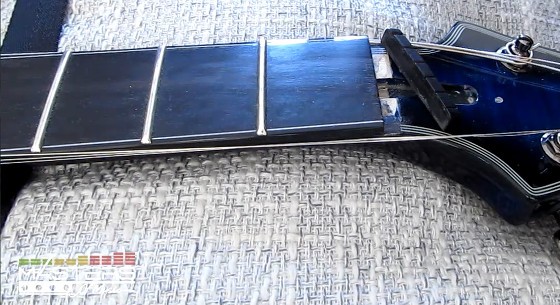
Replacing a guitar or bass nut (the piece at the top of the neck that the strings sit on) isn’t as difficult as most people think.
Installing a new nut is one of the easiest guitar maintenance projects aside from changing strings, and is a good do-it-yourself project even for beginners.
There are a number of reasons to give a guitar a nut transplant.
Sometimes they get worn too low and cause open string fret buzz.
Some are made out of cheap plastic and people want to change them out for nuts made from higher quality material.
Some brands claim their nuts improve tuning stability and help increase harmonics, among other things.
A couple weeks ago I picked up a used Schecter Blackjack SLS that has great low action and no fret buzz with large baritone strings, but when I swapped them out with some regular strings I found the nut was worn too low from the higher gauge strings rubbing it down so there was massive string buzz when using thinner strings.
Luckily a replacement nut only costs $10 so it’s an easy fix. I used a Graph Tech Black TUSQ Nut because it’s the original nut that comes stock on this particular guitar. Graph Tech is a popular brand with a bunch of nuts and saddles in various shapes and sizes so make sure to get the proper size for your guitar if you need a replacement.
I decided to put together a quick video tutorial outlining the process of how to install a new nut to show how easy it is.
Guitar Nut Replacement Video
How to Install a Guitar Nut Summary
1. Loosen strings and move them out of the way, and remove truss rod plate if needed.
2. Use a razor blade to carefully score along the edges of the nut to make sure it’s separated from the guitar’s lacquer finish.
3. Cover the fretboard with a cloth and use a small wood block to lightly knock loose the nut, or use a screwdriver tip to nudge it sideways if the nut is sitting in a slot.
4. Clean out the glue and residue on the guitar from under where the old nut was sitting so that the new nut has a clean, flush surface to sit on.
5. Compare the new nut with the old one for size differences. Test fit the new nut and make adjustments until it fits nicely in the slot. They often have to be sanded down slightly to get a perfect fit.
6. Once the nut fits properly do a dry test run to check the height of the strings. Tighten up the high and low e strings and use a feeler gauge to ensure the strings have the proper spacing at the first fret (specified by the particular nut).
It’s important to make sure the nut is fitting tightly and there are no gaps or spaces. During the test run in the video you can see a gap between the nut and fretboard that I had to go back and smooth out to get it to fit tighter.
7. After you confirm the nut is sitting at the perfect height, put a small amount of glue on the back of the nut then make sure it seats correctly as you tighten up the strings and leave it set long enough for the glue to dry. Make sure the nut is perfectly placed before the glue drys or you’ll have to do it all over again…

